I’ll take a slice of Raspberry Pi. I mean, come on, that was an obvious choice.
On the one hand, a microcontroller with built-in WIFI like an ESP32 would most probably not be sufficient to meet the demands we impose. On the other hand, we don’t need a full-grown Raspberry Pi with all its large connectors for the toy that I have in mind.
The Compute Module 3 was one dismissed option, although the flatness of the board is something I really like. The height of the original Raspberry Pi board and its successors always bothered me. I once backed a project on Kickstarter that allowed a Pi 3 to be installed into an old NES cartridge. For that purpose, I had to remove a few connectors (i.e. USB, RJ45) from the PCB. That was actually no fun at all. Furthermore, although the Compute Module 3 has a lot of computing power, it also has a higher power consumption accordingly. Additionally ,if I’m not mistaken, it misses the wireless features that we demand.
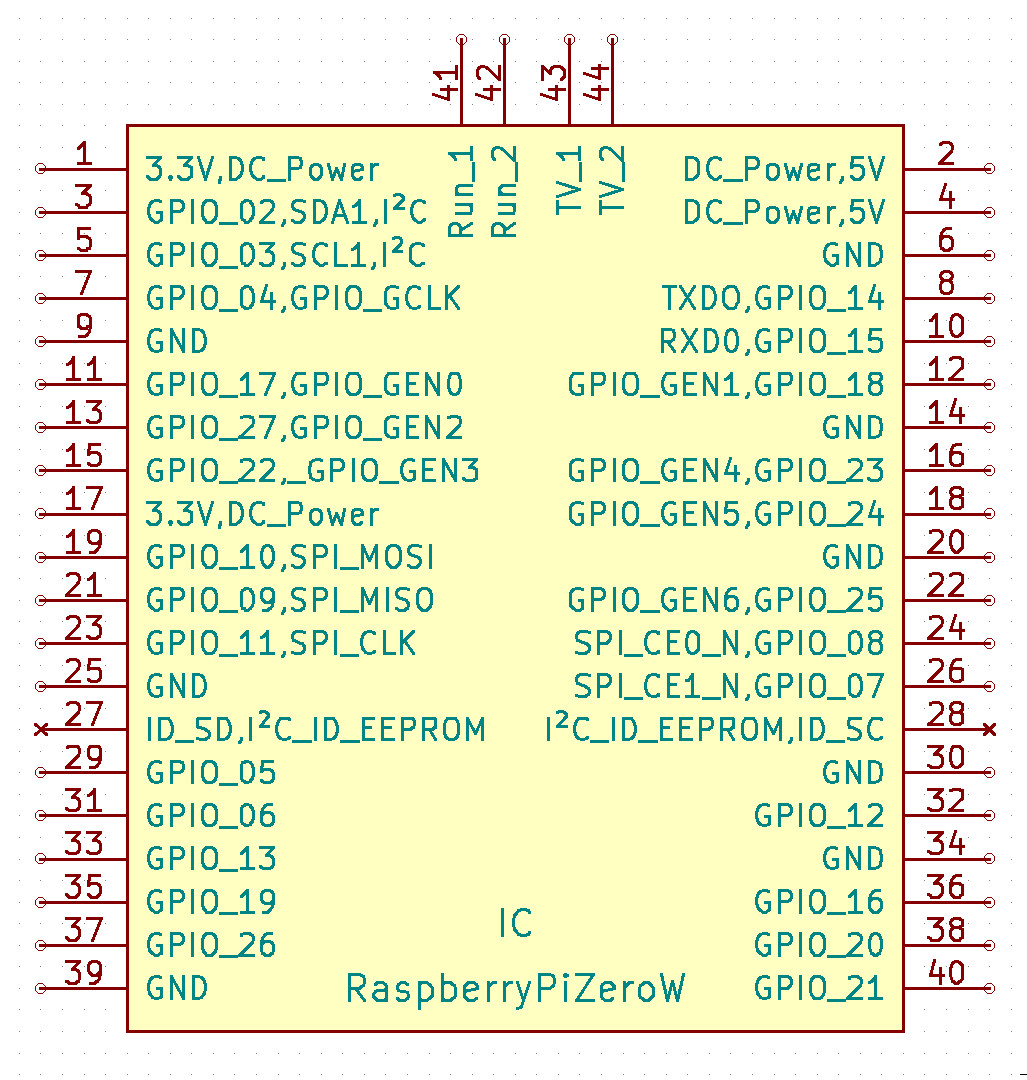
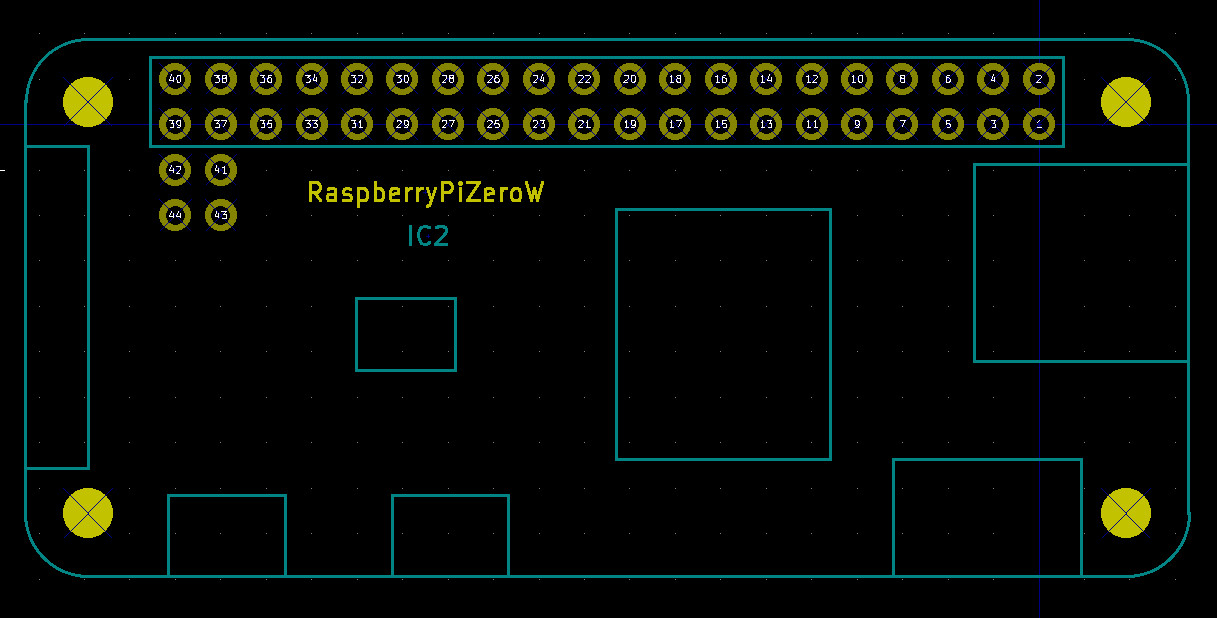
Something in between a simple microcontroller and a 64 bit quadcore computer (like the Pi 3 B) would totally suffice. The Raspberry Pi Zero W seems perfect.
The form factor is ideal for our project. Not only is it small concerning its surface area, but also flat. The low cost of only 10€ in comparison to a 35€ Pi 3 B+ commends for the Zero as well. A single core GHz ARM processor with 512MB of RAM should enable us to even run a multi-threaded piece of software on a smooth OS (spoiler alert: python is not really multi threaded). The built-in wireless connectivity is another nice feature which saves us time, space and money because we do not need to buy and solder these components. The community support is ridiculously good. There’s endless threads and examples that cover hardware topics, operating systems, configuration, programs, tuning and everything you can imagine.
It’s offical: we’re going with the Raspberry Pi Zero W.

The first thing concerning software matters is to get an operating system on our little Raspberry Pi up and running.
The officially supported OS on that tiny computer is Raspbian (the name is a blend of Raspberry and Debian) and that’s what I chose. Of course we wanna download and install the headless variant (aka lite version) because we don’t need a desktop environment.
There are tons of tutorials online on how to get the image onto your SD card and what to do then. Mine is just another one starting from our Linux host. I just wanted it to be included for the sake of completeness.
If you wanna do it your way, have a different host OS or for whatever reason, just follow along the official installation guide or use any other source of information to get an up to date version of Raspbian working.
So here’s what I did after downloading and unpacking the installation file for the (now outdated) Raspbian Stretch. All the instructions should still be valid for Buster.
On my host machine (marta@pc), I used lsblk to list all block devices available.
marta@pc $ lsblk

NAME           MAJ:MIN RM   SIZE RO TYPE  MOUNTPOINT
sda              8:0    0   1.8T  0 disk
└─sda1           8:1    0   1.8T  0 part  /hdd
nvme0n1        259:0    0   477G  0 disk
├─nvme0n1p3    259:3    0    15G  0 part
│ └─cryptswap1 253:0    0    15G  0 crypt [SWAP]
├─nvme0n1p1    259:1    0    60M  0 part  /boot/efi
├─nvme0n1p4    259:4    0 182.5G  0 part  /home
└─nvme0n1p2    259:2    0 279.4G  0 part  /
After that, I inserted a 16GB micro SD card into my host computer and waited until it was properly recognized. Then I repeated the command to find out the name of the device.
marta@pc $ lsblk

NAME           MAJ:MIN RM   SIZE RO TYPE  MOUNTPOINT
sda              8:0    0   1.8T  0 disk
└─sda1           8:1    0   1.8T  0 part  /hdd
nvme0n1        259:0    0   477G  0 disk
├─nvme0n1p3    259:3    0    15G  0 part
│ └─cryptswap1 253:0    0    15G  0 crypt [SWAP]
├─nvme0n1p1    259:1    0    60M  0 part  /boot/efi
├─nvme0n1p4    259:4    0 182.5G  0 part  /home
└─nvme0n1p2    259:2    0 279.4G  0 part  /
mmcblk0        179:0    0  14.4G  0 disk
└─mmcblk0p1    179:1    0  14.4G  0 part  /media/marta/sdcard
My SD card was identified as multi-media-card block device zero (mmcblk0) and had one partition which was automatically mounted to /media/marta/sdcard. I unmounted that very partition and verified the procedure by again listing all block devices and partitions.
marta@pc $ umount /dev/mmcblk0p1
marta@pc $ lsblk

NAME           MAJ:MIN RM   SIZE RO TYPE  MOUNTPOINT
sda              8:0    0   1.8T  0 disk
└─sda1           8:1    0   1.8T  0 part  /hdd
nvme0n1        259:0    0   477G  0 disk
├─nvme0n1p3    259:3    0    15G  0 part
│ └─cryptswap1 253:0    0    15G  0 crypt [SWAP]
├─nvme0n1p1    259:1    0    60M  0 part  /boot/efi
├─nvme0n1p4    259:4    0 182.5G  0 part  /home
└─nvme0n1p2    259:2    0 279.4G  0 part  /
mmcblk0        179:0    0  14.4G  0 disk
└─mmcblk0p1    179:1    0  14.4G  0 part
mmcblk0p1 was unmounted just as I wanted.
I then checked the size of the Raspbian image that I wanted to copy onto the SD card.
marta@pc $ ls -l --block-size=K 2019-04-08-raspbian-stretch-lite.img

-rw-r--r-- 1 marta marta 1761280K Apr 8 11:25 2019-04-08-raspbian-stretch-lite.img
It was about 1.8 GB of data to be copied.
Using iostat I saw that no data has been written to the SD card at that time (the last column is zero).
marta@pc $ iostat | grep mmcblk0

mmcblk0           0.13         4.13         0.00       4148          0

marta@pc $ sudo dd bs=4M if=2019-04-08-raspbian-stretch-lite.img of=/dev/mmcblk0 conv=fsync
It was time to copy the operating system to the MMC using dd and the downloaded file as input and our block device as output parameter.
This procedure took quiet some time and the values printed by dd couldn’t be trusted. After the command returned, I once again checked how much data was written to my I/O devices. I saw no further increase telling me that writing was really done. Better save than sorry, I synchronized all cached writings.
marta@pc $ iostat | grep mmcblk0

mmcblk0           1.31         2.72       609.15       7875    1761288

marta@pc $ sync
marta@pc $ lsblk

NAME           MAJ:MIN RM   SIZE RO TYPE  MOUNTPOINT
sda              8:0    0   1.8T  0 disk
└─sda1           8:1    0   1.8T  0 part  /hdd
nvme0n1        259:0    0   477G  0 disk
├─nvme0n1p3    259:3    0    15G  0 part
│ └─cryptswap1 253:0    0    15G  0 crypt [SWAP]
├─nvme0n1p1    259:1    0    60M  0 part  /boot/efi
├─nvme0n1p4    259:4    0 182.5G  0 part  /home
└─nvme0n1p2    259:2    0 279.4G  0 part  /
mmcblk0        179:0    0  14.4G  0 disk
├─mmcblk0p2    179:2    0   1.8G  0 part  /media/marta/rootfs
└─mmcblk0p1    179:1    0   256M  0 part  /media/marta/boot
Swapping the SD card in and out, the new partitions were mounted immediately.
Being able to access the Raspberry Pi Zero W wirelessly is a comprehensible request. We therefor create two files on the boot partition so that the Pi connects to a WIFI network as soon as it starts and lets us access itself via SSH.
The file /boot/ssh just needs to be existent for the Pi to start the SSH daemon, while /boot/wpa_supplicant.conf must contain all WIFI related information like your country code (‘illegal’ channels 12, 13, especially 14) and of course our network’s name and password. Save the files, synchronize once more and unmount the SD card.
marta@pc $ nano /media/marta/boot/wpa_supplicant.conf

country=YOUR_COUNTRY_CODE
ctrl_interface=DIR=/var/run/wpa_supplicant GROUP=netdev
update_config=1

network={
    ssid="YOUR_WIFI_NAME"
    psk="YOUR_WIFI_PASSWORD"
}

marta@pc $ touch /media/marta/boot/ssh
marta@pc $ sync
marta@pc $ umount /media/marta/boot
marta@pc $ umount /media/marta/rootfs
We’re finally ready to boot the Pi for the first time. Plug in the power, push the ON/OFF button and wait. You may try and ping the device. It should answer after some time. If it doesn’t, check your router for connected devices, maybe use a static address, scan your network for port 22 and check that the Pi is in physical proximity to the router, so it can pickup the wireless signal.
This information may be outdated by the time you setup your system as it has changed in the past. Please checkout possible variations of the WIFI and SSH setup procedure, if it doesn’t work as intended.
The first boot takes quite some time and the SSH daemon is not ready right after the start. So just give it a few seconds and try again. The username for SSH is pi, the default password is raspberry.
marta@pc $ ping raspberrypi

PING raspberrypi.home (192.168.1.117) 56(84) bytes of data.
From marta.home (192.168.1.125) icmp_seq=1 Destination Host Unreachable
From marta.home (192.168.1.125) icmp_seq=2 Destination Host Unreachable
From marta.home (192.168.1.125) icmp_seq=3 Destination Host Unreachable
...
64 bytes from raspberrypi.home (192.168.1.117): icmp_seq=11 ttl=64 time=1656 ms
64 bytes from raspberrypi.home (192.168.1.117): icmp_seq=12 ttl=64 time=633 ms
64 bytes from raspberrypi.home (192.168.1.117): icmp_seq=13 ttl=64 time=4.87 ms

marta@pc $ ssh pi@raspberrypi

ssh: connect to host raspberrypi port 22: Connection refused

marta@pc $ ssh pi@raspberrypi

The authenticity of host 'raspberrypi (192.168.1.117)' can't be established.
ECDSA key fingerprint is SHA256:a+INBecYdB1ABCDEFGHIJHCYWZ4eDlPY46G8NLKpX5U.
Are you sure you want to continue connecting (yes/no)?

yes

Warning: Permanently added 'raspberrypi,192.168.1.117' (ECDSA) to the list of known hosts.
pi@raspberrypi's password:

raspberry

Linux raspberrypi 4.19.57+ #1244 Thu Jul 4 18:42:50 BST 2019 armv6l

The programs included with the Debian GNU/Linux system are free software;
the exact distribution terms for each program are described in the
individual files in /usr/share/doc/*/copyright.

Debian GNU/Linux comes with ABSOLUTELY NO WARRANTY, to the extent
permitted by applicable law.
Last login: Thu Aug 29 20:36:53 2019 from 192.168.1.125

SSH is enabled and the default password for the 'pi' user has not been changed.
This is a security risk - please login as the 'pi' user and type 'passwd' to set a new password.

pi@raspberrypi $ passwd

Changing password for pi.
Current password: raspberry
New password: YOUR_NEW_PASSWORD
Retype new password: YOUR_NEW_PASSWORD
passwd: password updated successfully
Change the user’s password as soon as you have access to your Raspberry Pi using passwd.
The next thing I did was to make all the SD card’s storage available to the operating system. Use the nice user interface of raspi-config to do just that.
pi@raspberrypi $ sudo raspi-config
You wanna choose 7 Advanced Options and then A1 Expand Filesystem.
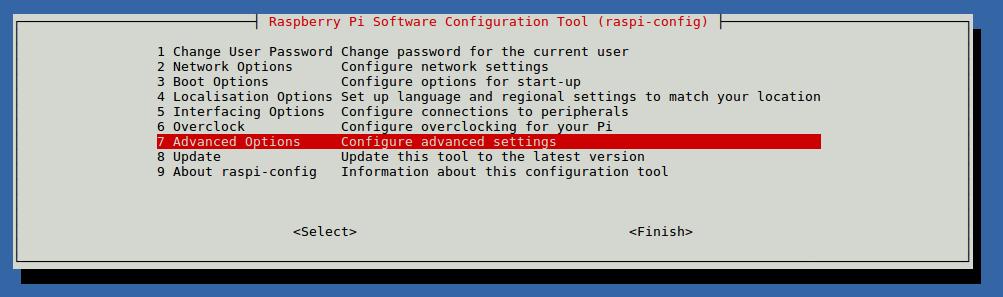

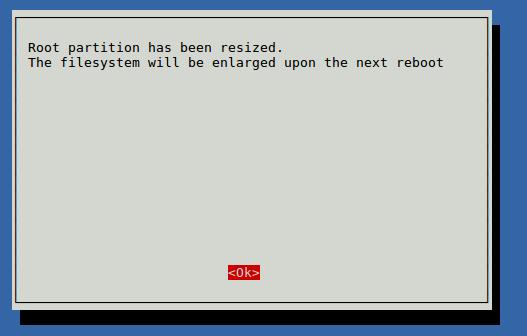
Reboot the device and verify that the available memory corresponds to your SD card’s disk space.
pi@raspberrypi $ sudo reboot now
pi@raspberrypi $ df -h

Filesystem      Size  Used Avail Use% Mounted on
/dev/root        15G  1.1G   13G   8% /
devtmpfs        213M     0  213M   0% /dev
tmpfs           217M     0  217M   0% /dev/shm
tmpfs           217M  5.8M  211M   3% /run
tmpfs           5.0M  4.0K  5.0M   1% /run/lock
tmpfs           217M     0  217M   0% /sys/fs/cgroup
/dev/mmcblk0p1   43M   22M   21M  51% /boot
tmpfs            44M     0   44M   0% /run/user/1000
Then update the package lists, upgrade the installed software and one more time reboot the device.
pi@raspberrypi $ sudo apt-get update
pi@raspberrypi $ sudo apt-get upgrade
pi@raspberrypi $ sudo reboot now
The operating system is now up to date and ready for some additional software.