When ordering electronic components in East Asia, I always put one or the other collateral super cheap product into my shopping cart.
That’s how I got to know the RDM6300. This RFID reader board has been lying around my desk and shelf for a long time until I finally tried it out when I started Marta. I played around with it a little bit and was surprised by how easy it is to read a tag with this device.
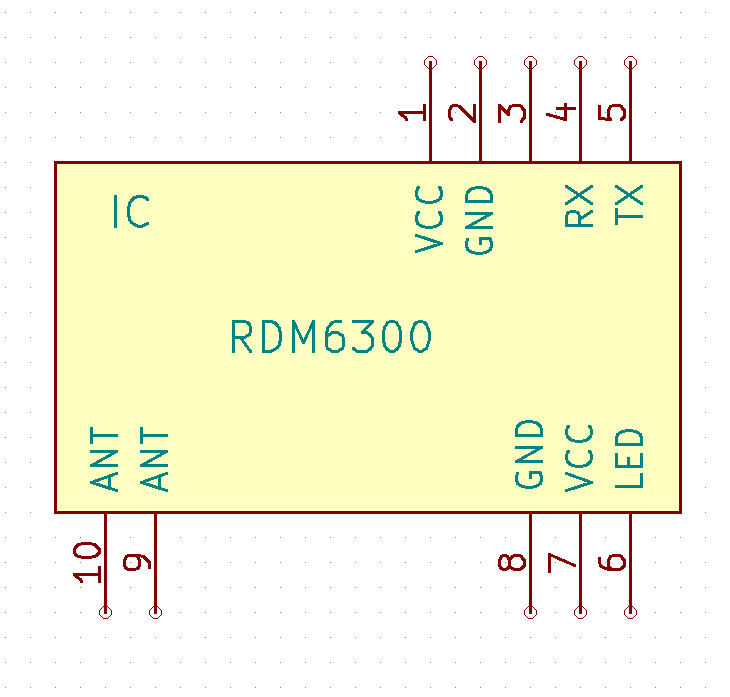
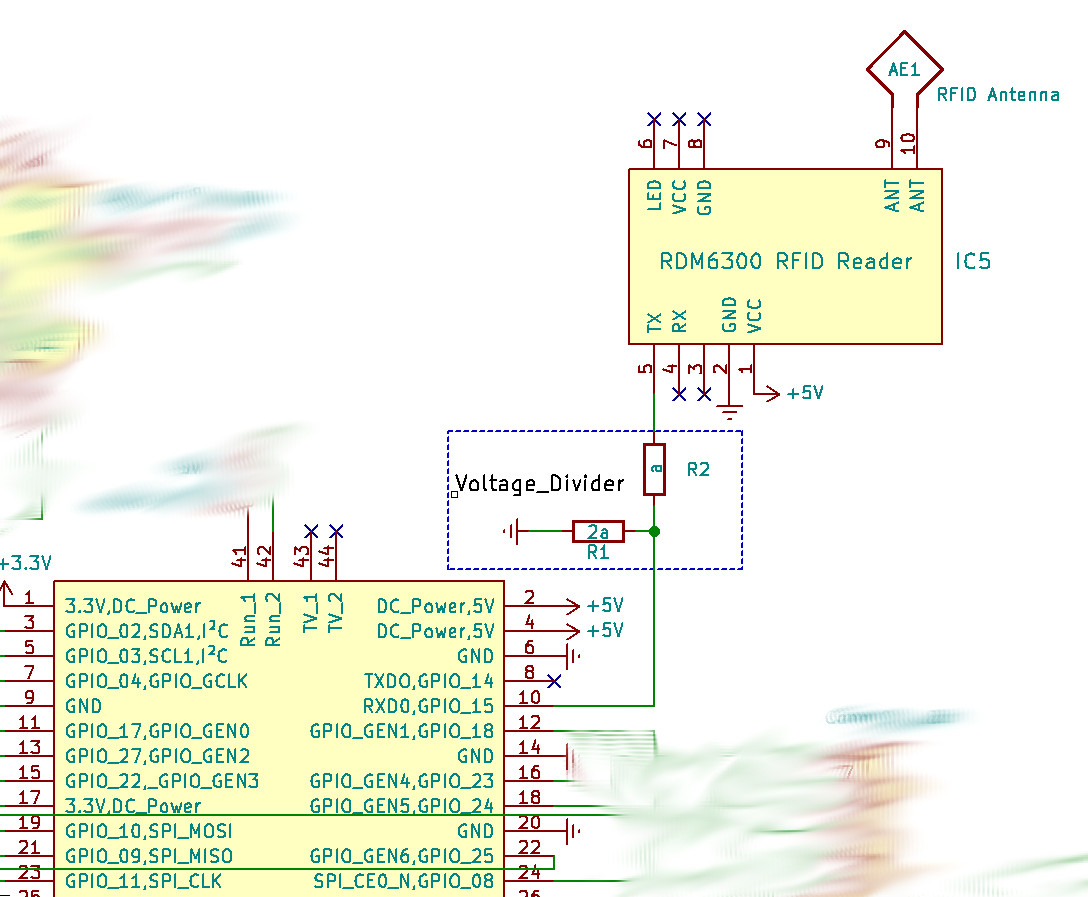
Just hook up the RFID reader’s TX pin to a serial port receiver (RX) and you’re good to go. Only make sure, both ends of the line speak the same logic level. The RDM6300 is a device working on 5V, while a Raspberry Pi for example only uses 3.3V GPIO. That means, we need to reduce the voltage between those two devices. We simply compose a voltage divider out of two resistors for that purpose. Two thirds of 5V is close enough to 3.3V. It’s as easy as choosing the second resistor to have double the resistance of the first one. I used 5kΩ and 10kΩ.
An Arduino Uno in comparison uses 5V logic, which enables you to connect the RDM6300 directly.
I later found out, that there are at least two different versions of these cheap RDM6300 modules in the wild. With the one that I used in the beginning, I was able to read the tag two to five times when it approached the antenna. It always worked and I never missed a single tag, but after that, the module didn’t send out anything although the tag was still on the reader.
This covers a normal and legitimate use case. You only want to detect when a tag is nearby and then do something. In such a scenario one probably doesn’t care about the time the tag is out of range.
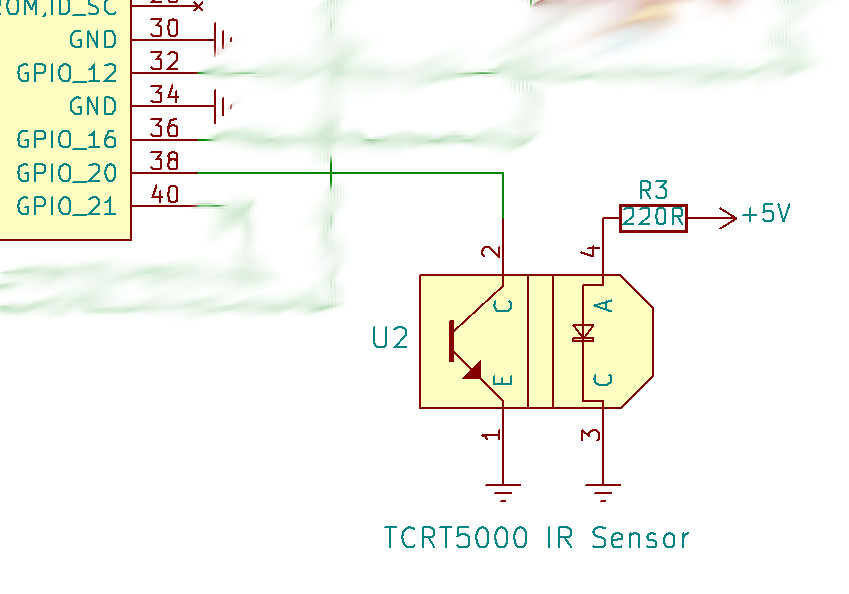
For our application unfortunately, this is not sufficient. We not only want to know when a tag is present but also when it has been removed. I solved the situation in an easy and cheap (~7ct) way, even designed and printed an enclosure part. I used a TCRT5000 reflective optical sensor with transistor output to recognize the absence of an object. It’s just a plain simple infrared LED and sensor combined in one case. The tag covered that very sensor when it was on the reader. As soon as it was removed, the voltage change was detected. The setup worked perfectly fine.
Luckily this solution became obsolete by the time a few reordered RDM6300 units from another source arrived. The boards looked slightly different. I only noticed that because the smaller antenna didn’t fit into my 3D printed part anymore. It was also of a red color, whereas the old one looked more like copper. The board also had minor variations. The new PCB’s label said ‘ROHS’ whereas the old one stated ‘HW-205’.
The surprising advantage of the new one was, that it keeps on sending the ID of the tag as long as the latter is in the RFID reader’s range. We can utilize this behavior to detect the removal of the tag (the reading just stops). So we definitely wanna go with that board.
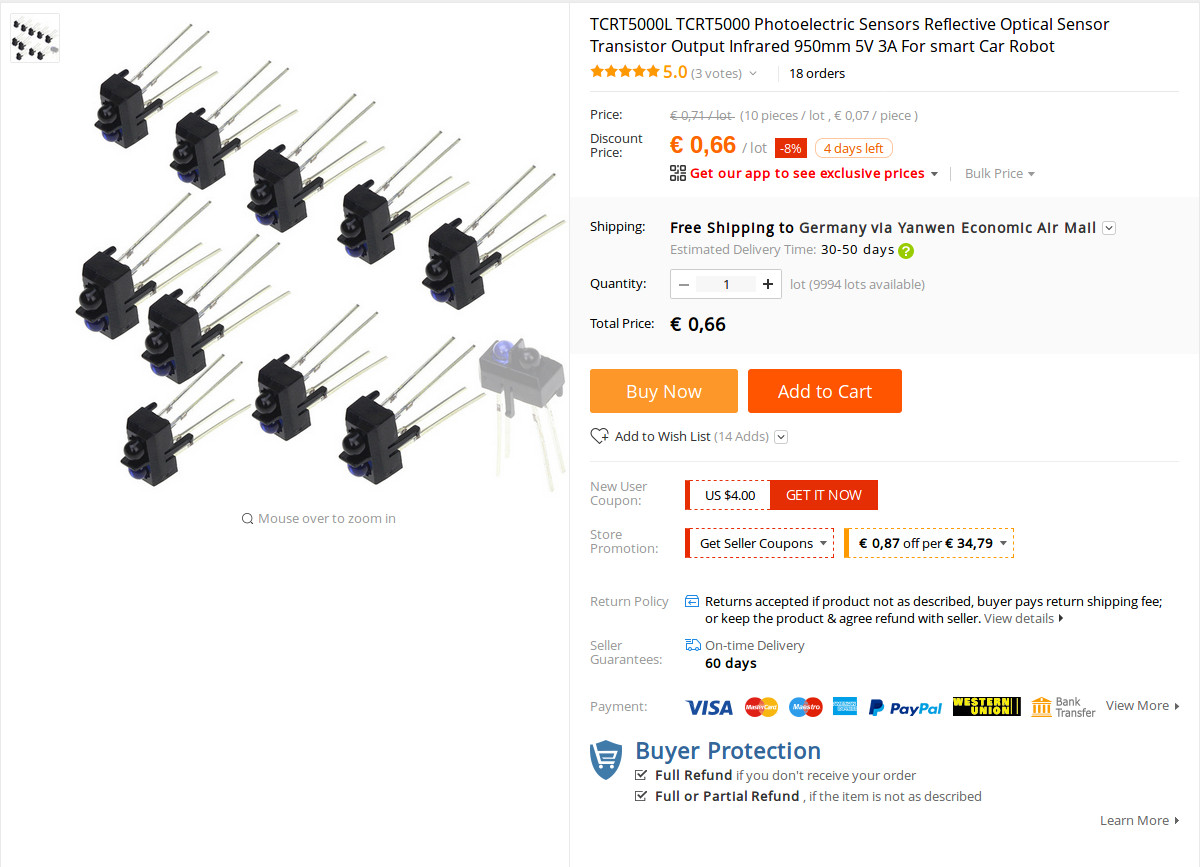
The RFID reader can be ordered from many websites and comes in at least these two versions. Observe the product pictures precisely to find out, which one you are buying. Unfortunately there’s not much documentation to be found, but maybe the board is configurable from one mode to the other via the serial input (RX).

!")
.")
The tags have to match the frequency used by the reader, of course. The product page says, the RDM6300 expects 125kHz, so I just ordered a pack of 100 tags from one of the first hits on AliExpress. Everything went flawlessly. They have a round plastic enclosure of 25mm diameter, some adhesive tape and a height of about 1.3mm. I’m pretty sure there are cheaper solutions but as I was satisfied with the result, so I accepted the price of 17ct per tag.

To get the software part working, we first need to make sure, that the serial port is enabled and we are the only one talking on the UART pins. Normally, the port is used as a console connection and kernel messages are written to the TX pin as well. We want to disable that behavior and use the serial port for our own purposes, namely to read the RFID tags.
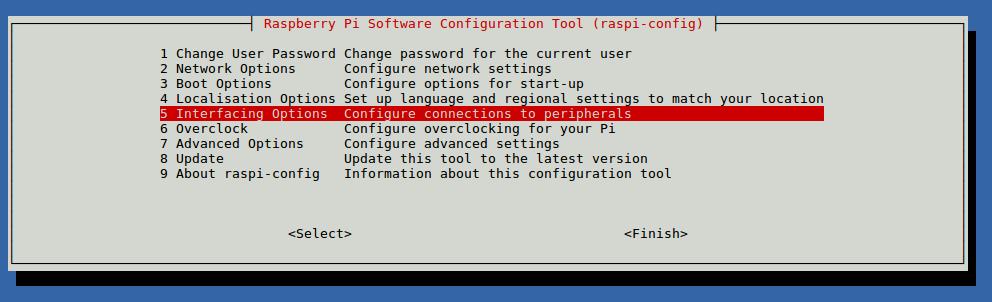
pi@raspberrypi $ sudo raspi-config
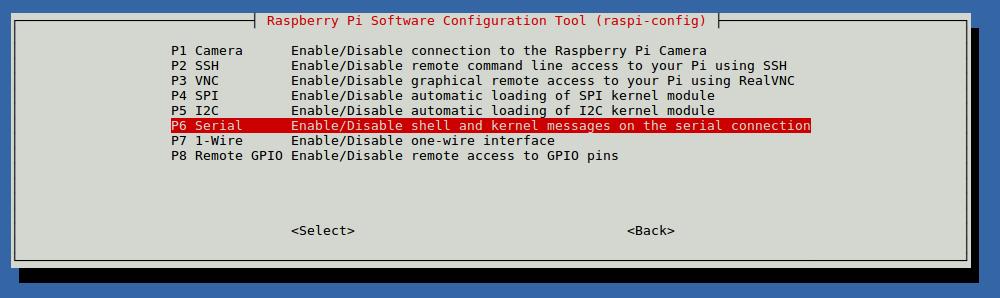
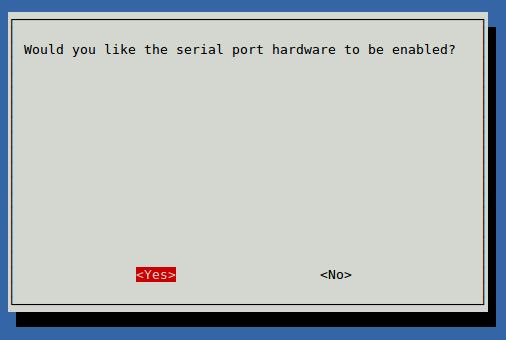
Choose 5 Interfacing Options, then P6 Serial and select No to disable the login shell. When asked if you want the serial port hardware to be enabled select Yes .


Reboot Marta to make sure, you are the only one talking on the serial device.
The RDM6300 constantly writes tag information to the Pi’s UART RX pin. We just need to pick up that info and interpret the characters. Change the terminal settings for our UART ‘terminal’ /dev/ttyS0 to a baudrate of 9600 and read from the device using cat. Then place a few tags near the reader’s antenna and hopefully see some output.
pi@raspberrypi $ sudo reboot now
pi@raspberrypi $ sudo stty -F /dev/ttyS0 9600
pi@raspberrypi $ sudo cat /dev/ttyS0

�5A008316824D5A008316824D5A008316824D5083820031200162450868D00164D5A838200164D5A838200164D5A838200162450868DA03182003124508684D5A838200162450868DA0312450868DA0312450868DA0312450868DA0312450868DA0312450868DA0312450868DA0312450868DA03124508162450868DA0312450868DA0312450868DA0312450868DA0312450868DA0312450868DA031245088200164D5A832450868DA03124D5A8382DA03164D5A838200164D5A838200164D5A838200164D5A838200164D5A838200164D5A838200164D5A838200312450868DA0312400164D5A838200164D5A838200168DA0312450868DA0312450868DA0312450868DA0312450868DA0312450868DA031245086800164D5A838200164D5A838200164D5A838200164D5A838200164D5A838200164D5A838200164D5A838200164D5A838200164D5A838200164D5A838200164D5A838200164D5A838200164D5A838250868DA0312450868DA0312450868DA03164D5A838200164D5A838200164D5A838200164D5A838200164D
The RFID reader sends out a start byte value of 0x02 if a tag was found, followed by two bytes version information, eight ID bytes, a two byte checksum followed by an end marker 0x03 (you can’t see all the characters in the terminal).
Now that we have a working connection and are able to read data from the serial port, we wanna install the python dependencies and add some logic to the reading. Again remember that we need to be root in order to access the serial port hardware.
pi@raspberrypi $ sudo apt-get install python-serial
pi@raspberrypi $ sudo python /home/pi/mmm/marta/RFIDReader.py

20:04:21.398 | RFIDReader |    place tags on the reader!
20:04:21.402 | RFIDReader |    ENTER or CTRL + C to quit
20:04:24.454 | RFIDReader |    tag: 5A008316824D
20:04:26.383 | RFIDReader |    tag: None
20:04:26.431 | RFIDReader |    tag: 5500ACCBB486
20:04:28.295 | RFIDReader |    tag: None
20:04:29.257 | RFIDReader |    tag: 5500ACCBB486
20:04:30.050 | RFIDReader |    tag: None
20:04:30.871 | RFIDReader |    tag: 5500ACCBB486
20:04:31.502 | RFIDReader |    tag: None
20:04:31.615 | RFIDReader |    tag: 5A008316824D
20:04:32.636 | RFIDReader |    tag: None
20:04:32.675 | RFIDReader |    tag: 5500ACCBB486
20:04:33.501 | RFIDReader |    tag: None
20:04:34.643 | RFIDReader |    rfid terminating.
Whenever I place a tag on the reader, the ID of it is printed only once until it is removed. As soon as the tag is not recognized anymore, ‘None’ is passed to the according function.