1 – Introduction

Marta Musik Maschine is a DIY, RFID enabled, multi-purpose, audio and light device for kids. It’s open source and you can build one yourself. It’s not hard at all, I promise.

Welcome to my blog about Marta Musik Maschine!

On the next few posts I’ll try to explain why and how I built a toy for children of around two years and up. This blog is dedicated to the idea of you, the reader, understanding my design considerations, allowing you to build your own M3 and if you like advance the casing, electronics or software part of this project.

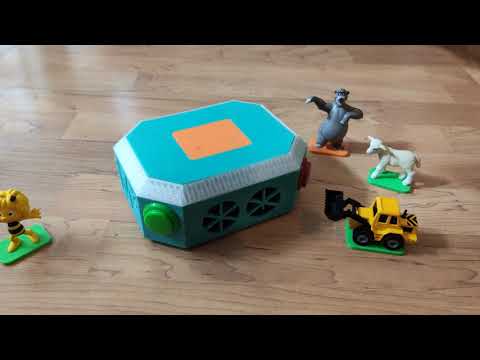
Before diving into the build process and all its details, have a look at the finished product in action.

Marta Musik Maschine - 3D Printed DIY Tonie Box - Demo

Continue reading “1 – Introduction”

1.1 – Blog Meta Information

I’m not saying that I hate web development, media and publishing, but I don’t like it either.

In this series of blog posts, I’m going to present a multi purpose kids toy called Marta Musik Maschine. But before diving into the build process, let me say a few words about the blog itself.

This WordPress instance runs on a non-dedicated server (i.e. simple web space). I don’t see an easy way of hosting something like GitLab at the moment. All the source code, 3D models and KiCad files belonging to this project can instead be found in an external repository at github.com/martamusikmaschine/mmm.

I’m not a native English speaker. I’m writing the blog posts after long work days and evenings full of kids animation. Please forgive me the one or the other not too eloquent sentence (like this). If you find any misspellings or strange word constructs that you want to be fixed, just let me know by commenting under the article or emailing me (marta [at] martamusikmaschine [.] com).

Continue reading “1.1 – Blog Meta Information”

1.3 – Features and Requirements


Actively think about the way you want to reach your target by dividing your project in smaller, yet functional parts.

Before moving pell-mell into a new project, even a private one, write down what you want to accomplish, what’s most important and what can possibly be neglected. Reflect on your possibilities and limitations concerning experience, personal capabilities, tools, space, spare time, money, preferences, help and everything that could possibly interfere with your intermediary goals. Do not forget, that learning is an accomplishment in itself. It’s totally legitimate to define the possession of a new capability as part of your project.

Continue reading “1.3 – Features and Requirements”

1.5 – Shopping List (BOM)


“Show me the money!”

You’ll need a few things to fulfill your lifetime dream of building and giving away your own Marta Musik Maschine.

Before ordering anything, make sure that all the prerequisites are met for this project. Definitely read through every single blog post so that you know what’s coming up to you. It’s important to have a few things at hand and a certain set of skills if you want to successfully conduct the task of building M³ the way it is intended:

Continue reading “1.5 – Shopping List (BOM)”

2 – Electronics and Software


A fundamental task on the real project was to identify the electronic components needed to realize the idea.

So the very first thing I did was to simply hook up a few components I had at hand and play with them. As I had the ‘clever’ idea of integrating a universal power supply (UPS) on the board, I ordered a few ultra capacitors (10 and 20 Farad) and hooked them up with some resistors. I burned one of the capacitors immediately because I was so excited that I forgot I had to use at least two of them in series for a 5V setup (one has a maximum voltage of 2.7V, which I knew). Doing it right I was able to confirm my assumptions about the maximum current flowing through the components. I find these little ‘in series’ USB adapters pretty useful for that purpose. They give quite accurate readings for what they are and what they cost. These little devices even integrate the current over time, which is a useful feature. I only own cheap amateur electronic tools which (at least for my projects) suffice most of the time. I discarded the whole UPS circuit much later.

Continue reading “2 – Electronics and Software”

2.1 – Marta PCB


22 black and white PCBs for 25€ including a basic check and priority DHL airmail shipping. Can this really be true?

After I had a running prototype of M³ including a software proof of concept for every device, I wanted to design and order a professionally fabricated PCB as soon as possible. The weather was really good at that time of the year. That summer was one of the driest and hottest in Germany since a very long time (UPDATE: the next summer was even hotter, one of the warmest ever recorded). I allowed myself to open the balcony door while working midday. My kid was asleep anyway.

Continue reading “2.1 – Marta PCB”

2.3 – Clone Marta Software


This blog is just half the truth.

It is tightly coupled to a GitHub project with the source code, KiCad project, 3D printer STL files and a little bit of documentation.

You need to check that project out on the Marta machine in order to access all the scripts we’ll need in the upcoming blog posts. Because I didn’t want to maintain multiple branches for different purposes, you may just checkout the master. That means, there’s no distinction between the scripts needed on the Pi or the projects you may want to edit on your home computer (like KiCad).

Continue reading “2.3 – Clone Marta Software”

2.4 – PCM5102 Sound Board + Loudspeakers


I’m not proud of curl XYZ | bash but desperate times call for desperate measures.

There are reasons why we do not want to use the on-board sound output of the Raspberry Pi. First of all we have to distinguish between the digital audio out via HDMI and PWM driven pseudo analog voltages passed through a few passive components (mainly resistors and capacitors).

Continue reading “2.4 – PCM5102 Sound Board + Loudspeakers”

2.5 – Arcade Push Buttons + LEDs + Standard components


When prototyping and fiddling around, make sure to always have enough standard components at hand.

To let the little user interact with the device, we need a few buttons. The bigger the better I thought. Arcade machine buttons come in intense colors and have a perfect size. A price tag of 50ct per button seems reasonable. I found one particular product nice, because it is not as deep as a lot of the competitive products. Look for buttons with a diameter of 24mm and a depth of roughly 33mm.

Continue reading “2.5 – Arcade Push Buttons + LEDs + Standard components”

2.6 – RDM6300 125kHz RFID Reader


When ordering electronic components in East Asia, I always put one or the other collateral super cheap product into my shopping cart.

That’s how I got to know the RDM6300. This RFID reader board has been lying around my desk and shelf for a long time until I finally tried it out when I started Marta. I played around with it a little bit and was surprised by how easy it is to read a tag with this device.

Continue reading “2.6 – RDM6300 125kHz RFID Reader”

2.7 – MPU6050 Accelerator and Gyroscope


Situational awareness in terms of positional information is a nice way of interaction with an electronic consumer product.

The GY-521 is a breakout board for the MPU6050 chip. The latter one consists of a three axis gyroscope and a three axis accelerometer. That’s why it’s often referred to as six axis MEMS motion tracking device.

Continue reading “2.7 – MPU6050 Accelerator and Gyroscope”

2.8 – WS2812B LED Strip + 74HCT245


I love these smart LED strips so much and used them in so many projects.

As I have already mentioned, it is a good idea to include some kind of feedback mechanism other than sound. We use the speakers as main application (namely to play music), but at the same time we want the child to be able to intuitively understand the inner state of our machine by means of light.

Continue reading “2.8 – WS2812B LED Strip + 74HCT245”

2.9 – On/Off SHIM


Why didn’t anyone make a cheap alternative available yet?

From the very beginning it was clear to me that, in order to prevent memory errors (yes this is a real danger and not an urban legend) an unexpected power loss should not occur. I have experienced filesystem corruptions on one of my Raspberry Pis before. Here’s a hint, why this could happen.

After giving up the idea of a UPS built from a simple circuit using super-capacitors, I was looking for an alternative. The requirement was still the same: When the user or the system itself instructs a shutdown, a software procedure should take care of gracefully halting the device and eventually disconnecting the power. Afterwards, no (leakage) current should be flowing from the battery into the device.

Continue reading “2.9 – On/Off SHIM”

2.10 – Intenso Power Bank


Power banks mainly provide our smartphones with energy while traveling. They can also be used for all kinds of electronic projects when it comes to standalone devices.

For our particular application we have a few requirements:

  • well-known brand so it can be ordered from hopefully anywhere in the world
  • compact size
  • suitable connector arrangement
  • high charging/discharging current (well relatively)
  • charge while discharging (allows an operation while plugged in)

Continue reading “2.10 – Intenso Power Bank”

2.11 – Marta POC Main Script


I worked on the software for a few nights and it’s really dirty but come on, it’s also free, everyone can have it and it works. So actually, my code has a lot in common with yo mamma. Sorry, couldn’t resist.

Now that you have seen all of the components up and running individually, it’s time to use them all together. There’s a proof-of-concept implementation available speaking to all the sensors, speakers and lights. It’s nothing fancy but definitely enough to get you going. The current status of the Python scripts is like “kinda works”.

Continue reading “2.11 – Marta POC Main Script”

3 – 3D Printed Plastic Enclosure


To be honest: Planning, designing and printing the enclosure took some evenings. And then a few more… and nights…. and days and then evenings again.

I’ve never designed anything as complex as the Marta housing in CAD. The enclosure is not even that elaborate but the level of difficulty was perfect for me. All components had to fit inside the housing in a space consuming way. Actually, the design process influenced the choice of electronic components and vice versa.

Continue reading “3 – 3D Printed Plastic Enclosure”

3.1 – Main Body and PCB Holder


I totally forgot the holes for the general purpose aviation plug connectors.

The main body is by far the largest 3D printed part. It’s essentially an octagon with walls. These walls have some cavities for the speakers as well as for the four arcade buttons. The same applies to the bottom side of the enclosure where we have holes for screws, buttons and lights.

Continue reading “3.1 – Main Body and PCB Holder”

3.3 – RFID Reader Holder and Top Plate


The main user interface is a simple small orange plate.

It’s not the buttons but the RFID reader that makes the device special in terms of user interaction.

In the top plate’s center there is a little orange piece of plastic holding the RFID reader’s antenna. The thickness is reduced where the antenna operates so that tags may be detected reliably. Magnets arranged in the corner of the antenna will hold the tags in position. Magnets with a diameter of 8mm will fit in perfectly. The number of magnets can be changed without printing a new part as they are held by screws.

Continue reading “3.3 – RFID Reader Holder and Top Plate”

4 – Forgotten Failures and Fancy Future Features


It seems like I’m really into alliterations.

Not everything went exactly the way I planned it and there are still so many things to do. The project is in such a state that the box and the software are totally usable. My children love it.

It’s been something like two years since most of the work was done. I didn’t have the time or leisure to improve the system anymore. In the last few weeks I wanted to at least complete the blog post series so that other people may build their own Marta.

Continue reading “4 – Forgotten Failures and Fancy Future Features”

4.1 – Super-Capacitors + Diodes + Resistors


Several hundreds of amperes in a kid’s toy, what could possibly go wrong?

Even if it’s just a few dozens of amps current when accidentally short circuiting a super capacitor, it’s still a little dangerous. Nevertheless, it seemed to be a reasonable idea at the time.

In my idealized world, a super-capacitor should provide enough capacitance to run the machine long enough to safely shutdown the whole system. As soon as the input was disconnected, the Pi was supposed to be running for a few seconds from the power supplied by the capacitor. As the main source is detached physically by a switch, no leakage current could occur afterwards. We’d be save even if the battery was empty.

Continue reading “4.1 – Super-Capacitors + Diodes + Resistors”

4.2 – 18650 type 3.7V Li-Ion Batteries + Charger/Discharger Step-Up Converter + Battery Protection


If Tesla powers a car with 7,104 of those batteries, why shouldn’t I use four of them?

Type 18650 batteries can be found in many applications. The huge battery packs used in electric vehicles often consist of thousands of those units. Hook up a few of the cells in series and parallel, et voilà you have your notebook battery.

Wanting to utilize these lithium-ion batteries as a portable power source for Marta, I was planning on increasing the capacity by wiring up four of them in parallel using a battery holder.

Continue reading “4.2 – 18650 type 3.7V Li-Ion Batteries + Charger/Discharger Step-Up Converter + Battery Protection”

4.3 – Software Improvements and Ideas


“I’m sorry, my software is perfect. You must be the problem.”

As I have already mentioned, the software was developed to proof that the hardware works and can be used by children. It’s still in an unfinished condition. By the way, I have never ever in my life seen a sufficiently complex piece of software that was ‘finished’. Marta is usable in its current state, not more, not less.

If I had the time, here are a few things I would try to improve or develop:

Continue reading “4.3 – Software Improvements and Ideas”

4.4 – Hardware Improvements and Ideas


I will not touch that PCB design anymore. It works and that’s good. Enclosure improvements are okay.

One could easily hook up an RFID reader to an ESP32, add a battery and speak to the Alexa or Sonos API in order to play a song as soon as a specific tag has been recognized. But that’s not what I had in mind when designing the toy. It was always supposed to be some kind of self-contained device. That means, I would not sacrifice the speaker setup in favor of a bluetooth only solution. We’d trade a little space for a more complex setup and that’s something I don’t like. The device should work all by itself.

But just like the software, the hardware is not completed. It can always be optimized. Here are few ideas I have in mind:

  • I added two general purpose connectors on the PCB. They both consist of +5V, +3.3V, GND and 5 unused GPIO pins. It would be nice, if the enclosure had appropriate connectors, too. I ordered two 8 pin GX16 aviation plugs which should work out. The box has enough space left to include these on one of the shorter sites.

Continue reading “4.4 – Hardware Improvements and Ideas”