A fundamental task on the real project was to identify the electronic components needed to realize the idea.
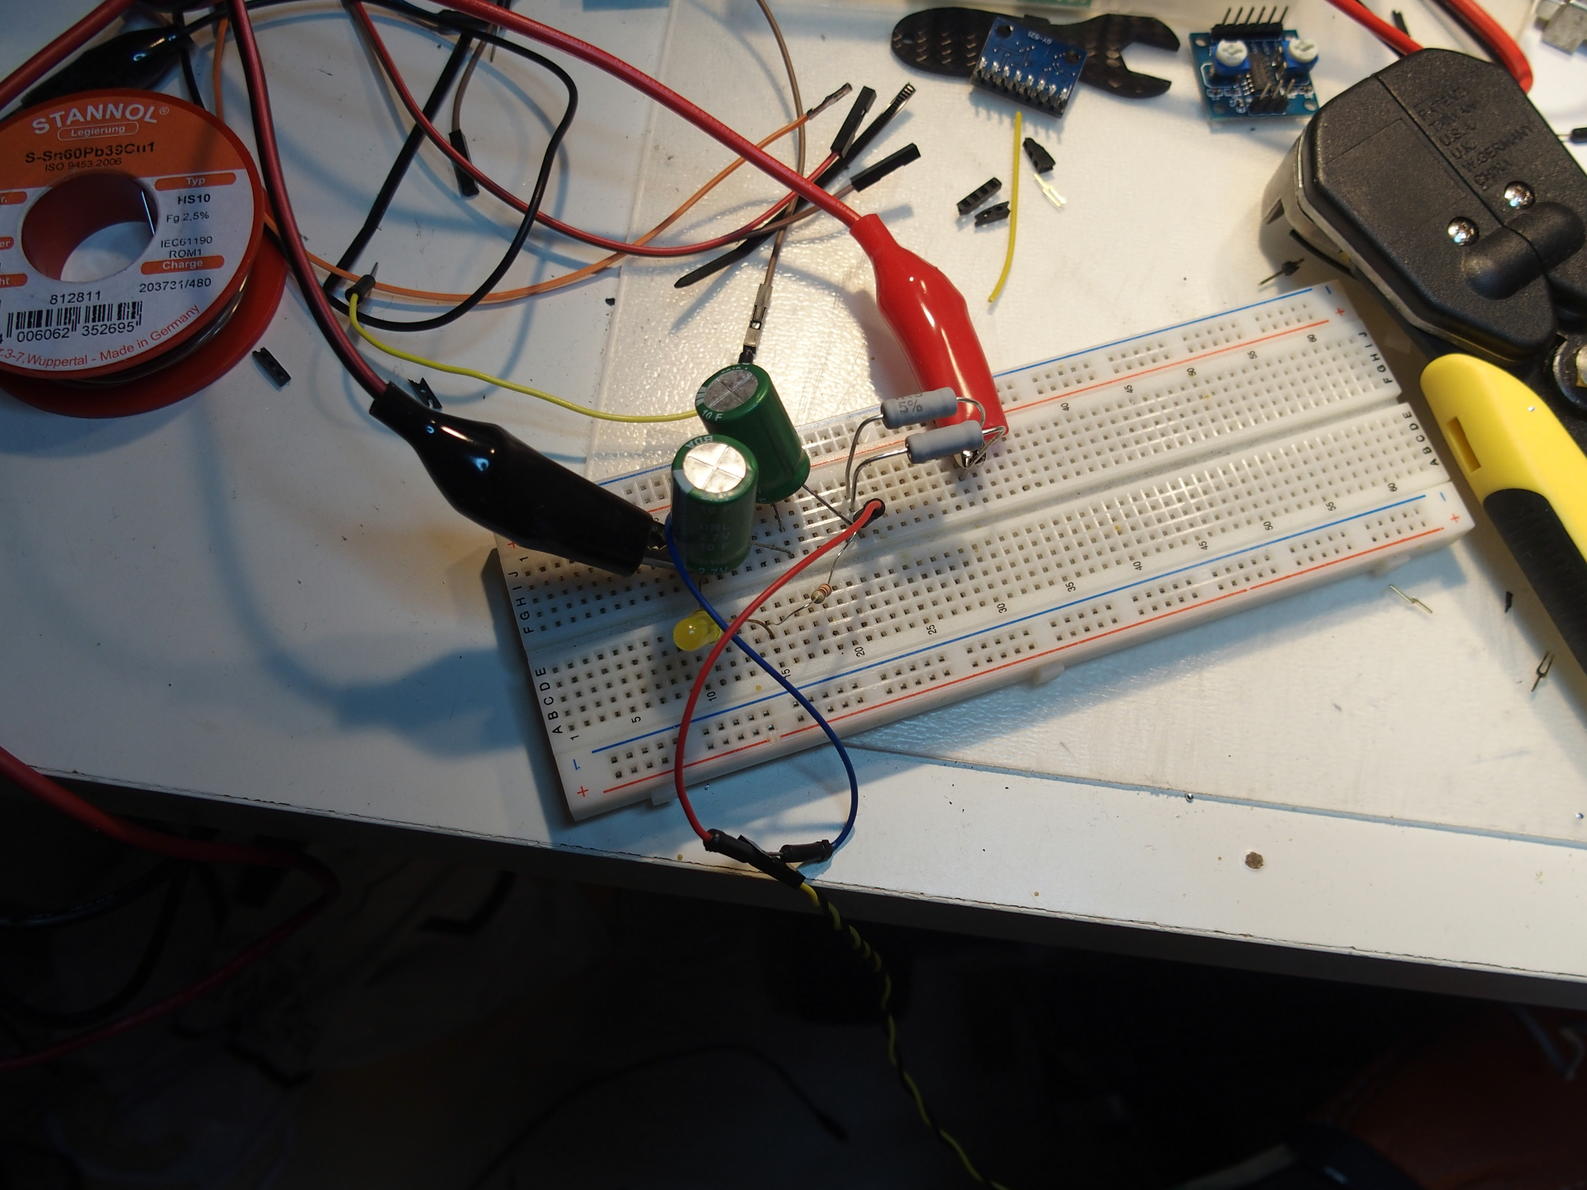
So the very first thing I did was to simply hook up a few components I had at hand and play with them. As I had the ‘clever’ idea of integrating a universal power supply (UPS) on the board, I ordered a few ultra capacitors (10 and 20 Farad) and hooked them up with some resistors. I burned one of the capacitors immediately because I was so excited that I forgot I had to use at least two of them in series for a 5V setup (one has a maximum voltage of 2.7V, which I knew). Doing it right I was able to confirm my assumptions about the maximum current flowing through the components. I find these little ‘in series’ USB adapters pretty useful for that purpose. They give quite accurate readings for what they are and what they cost. These little devices even integrate the current over time, which is a useful feature. I only own cheap amateur electronic tools which (at least for my projects) suffice most of the time. I discarded the whole UPS circuit much later.
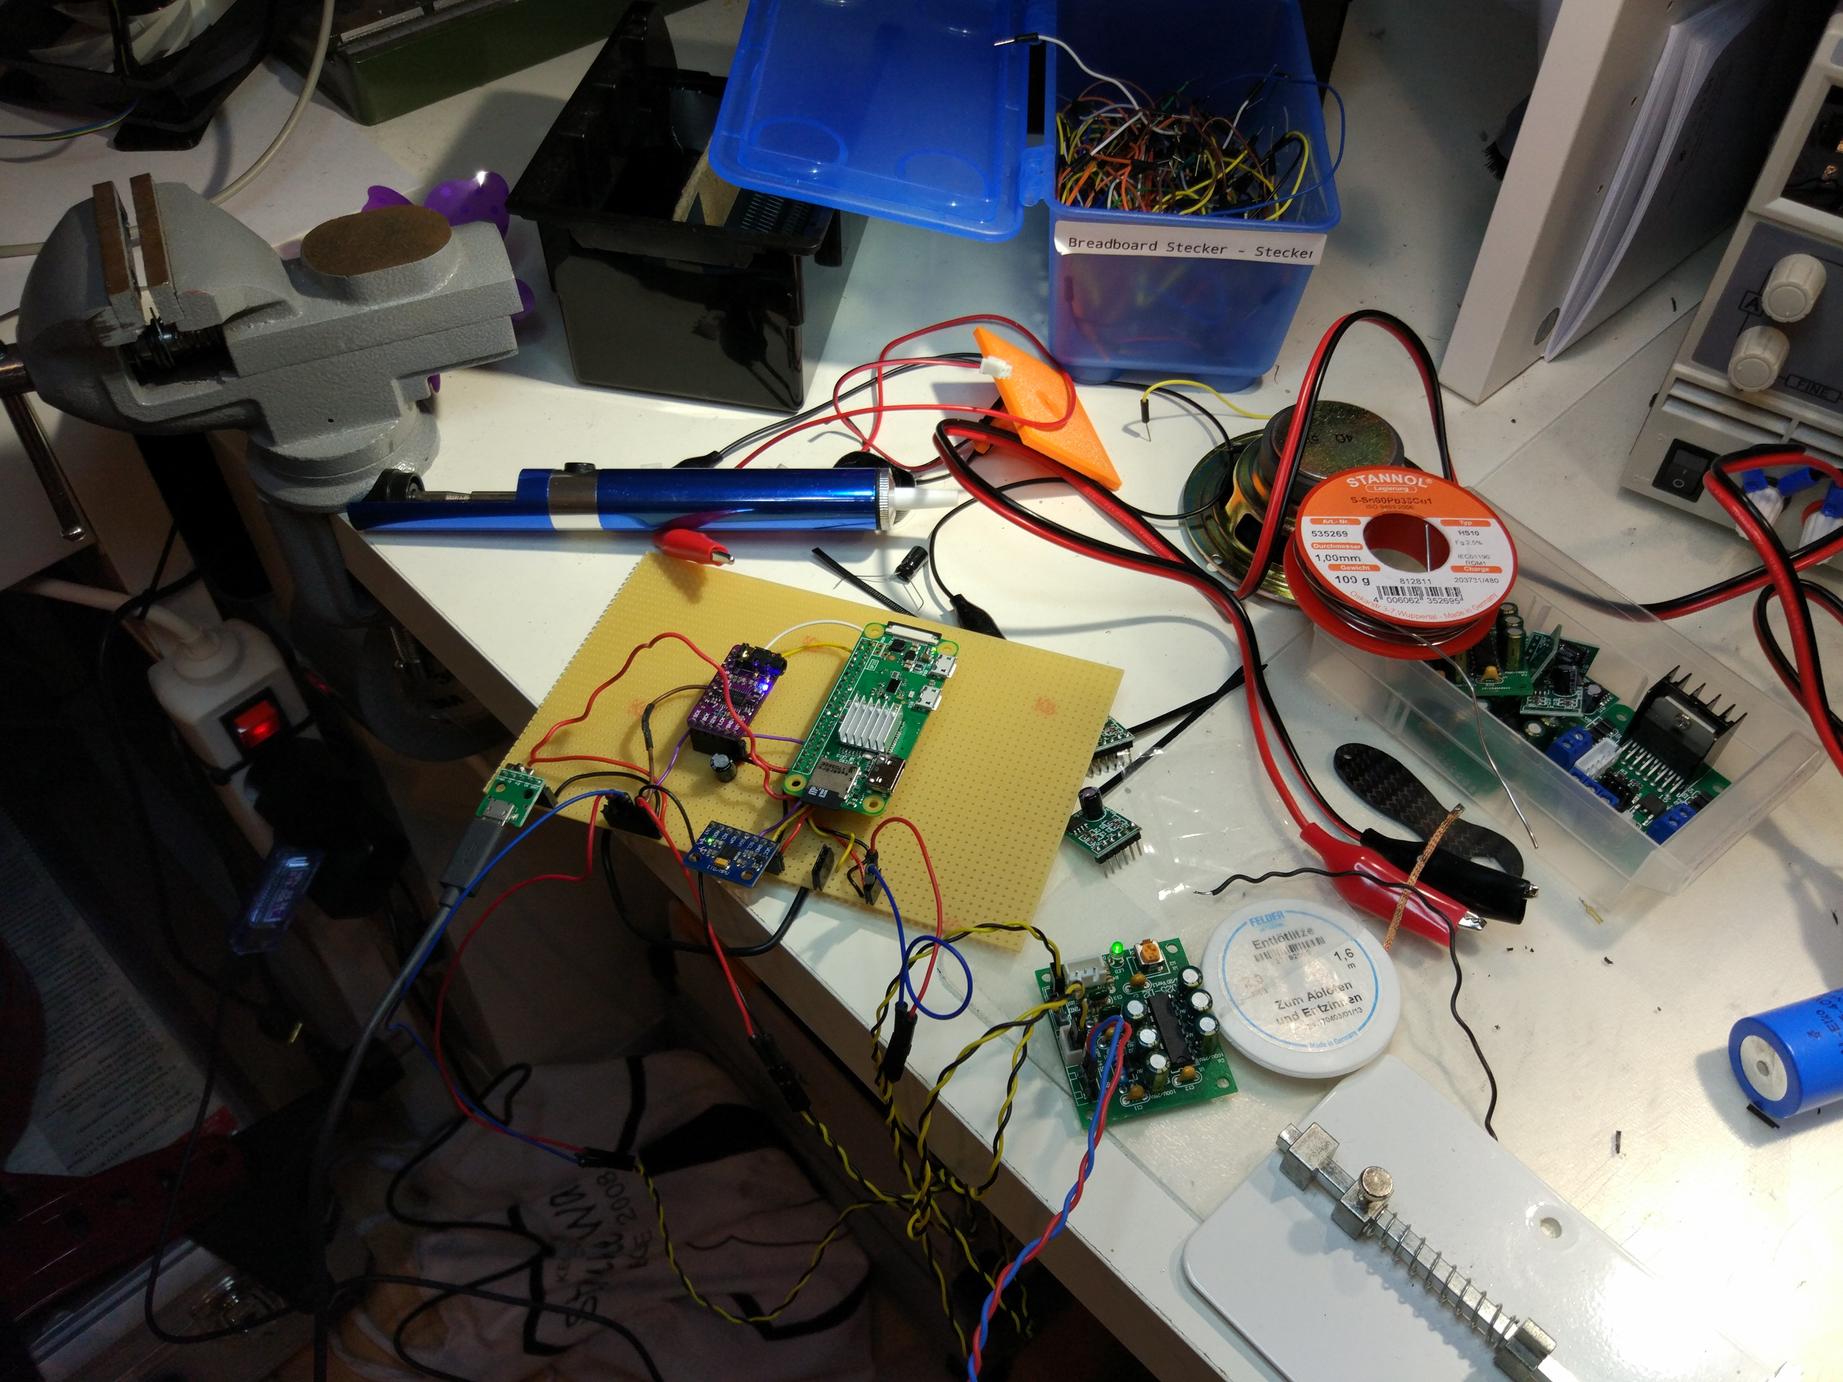
In the following days I tried out many boards, sensors and actors, fiddled with magnets, soldered a few components together and even began to write parts of the software. It was a creative phase.

After that initial stage of random tryouts I had a slightly better understanding of what I actually wanted to build and what was necessary to fulfill the task. I then ordered many components in far east and continued testing as soon as one of the ordered boards arrived. By doing that, I was able to dismiss a few ideas I had in mind and concentrate on what was really possible given the tight time table.
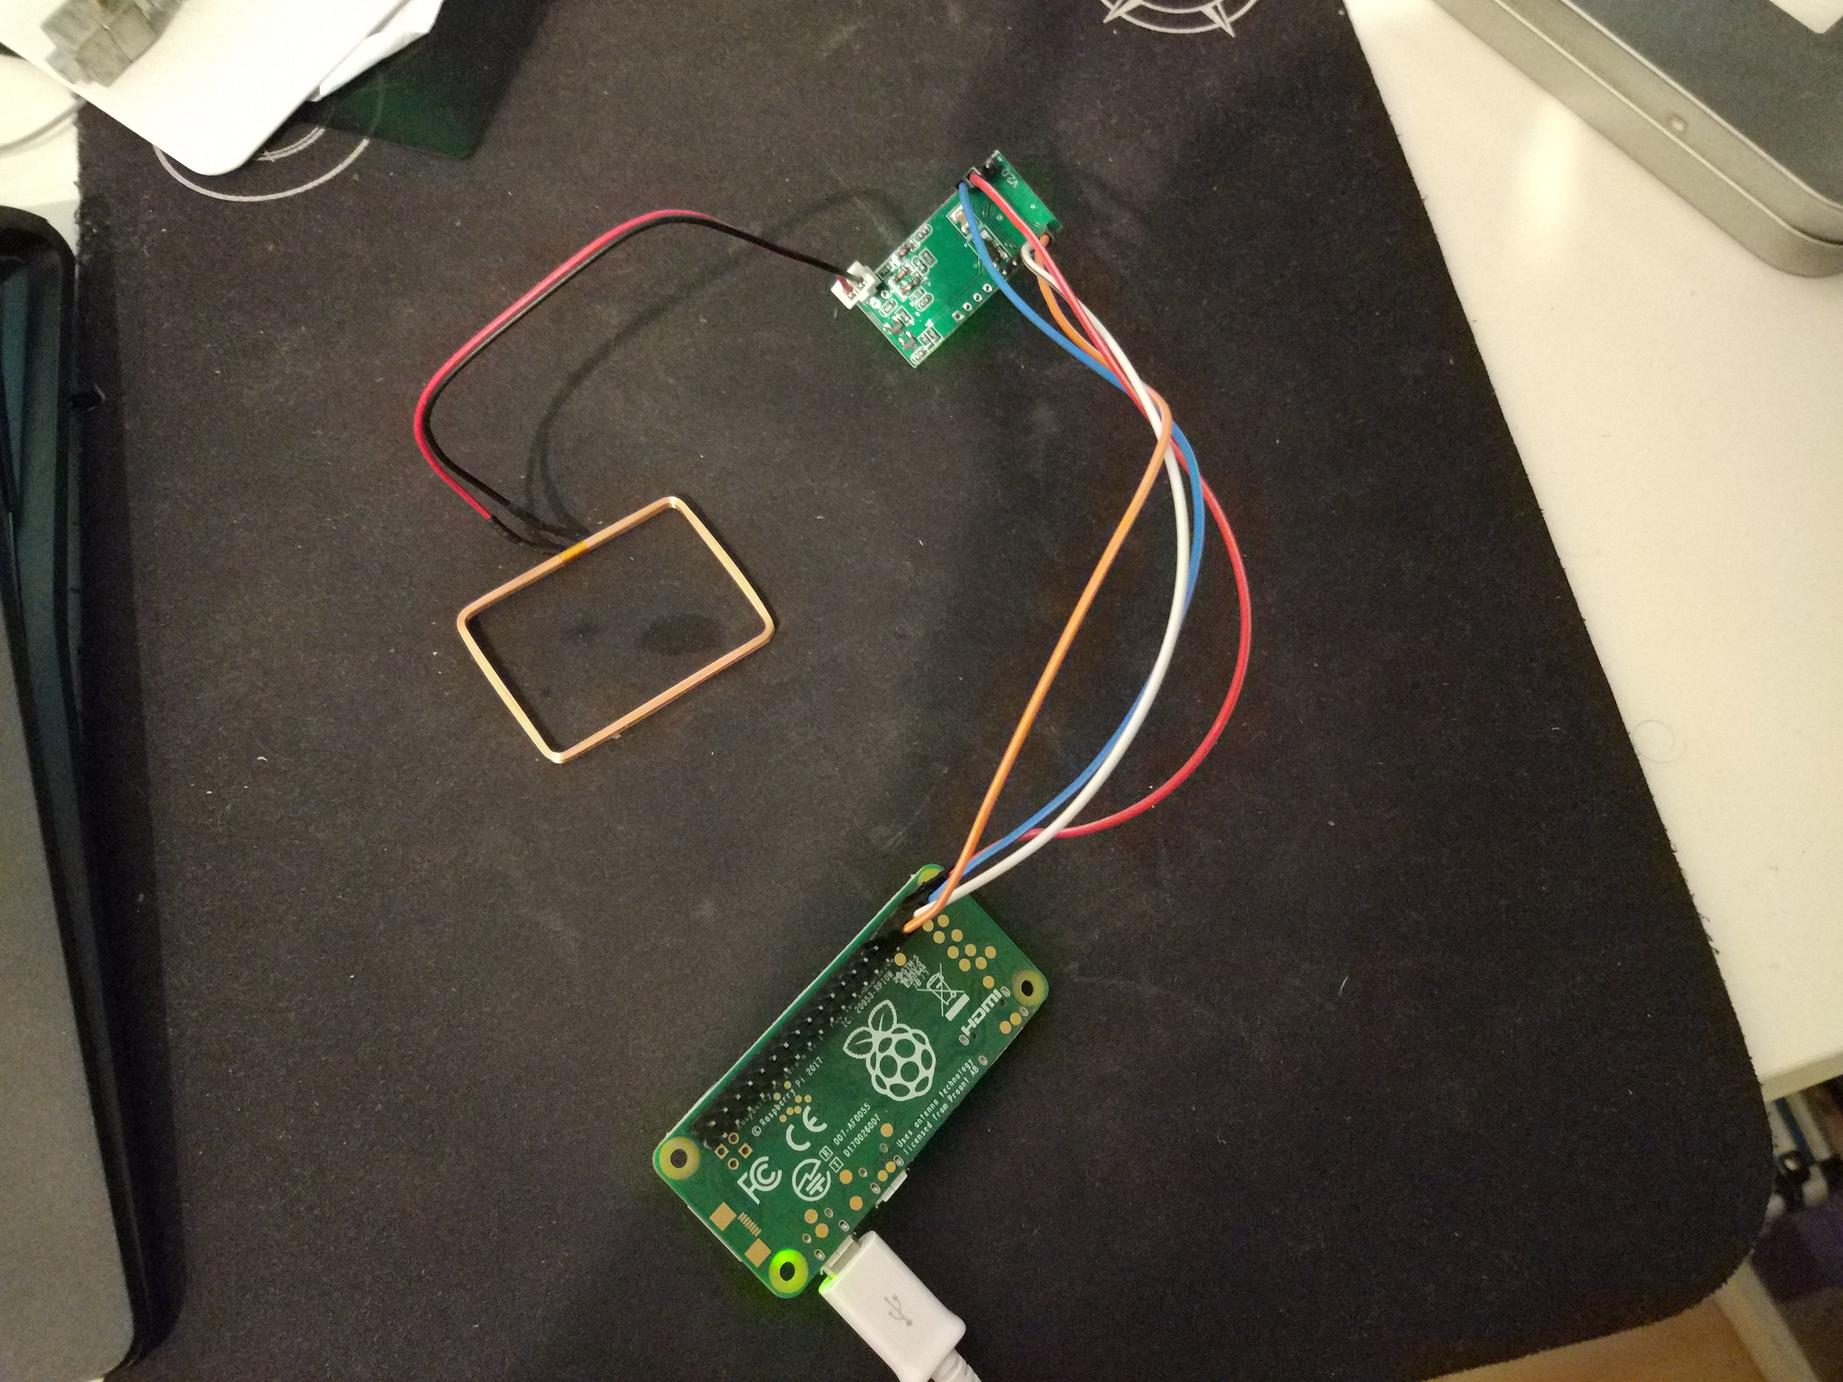
Eventually it was time to hook up some of the components together.
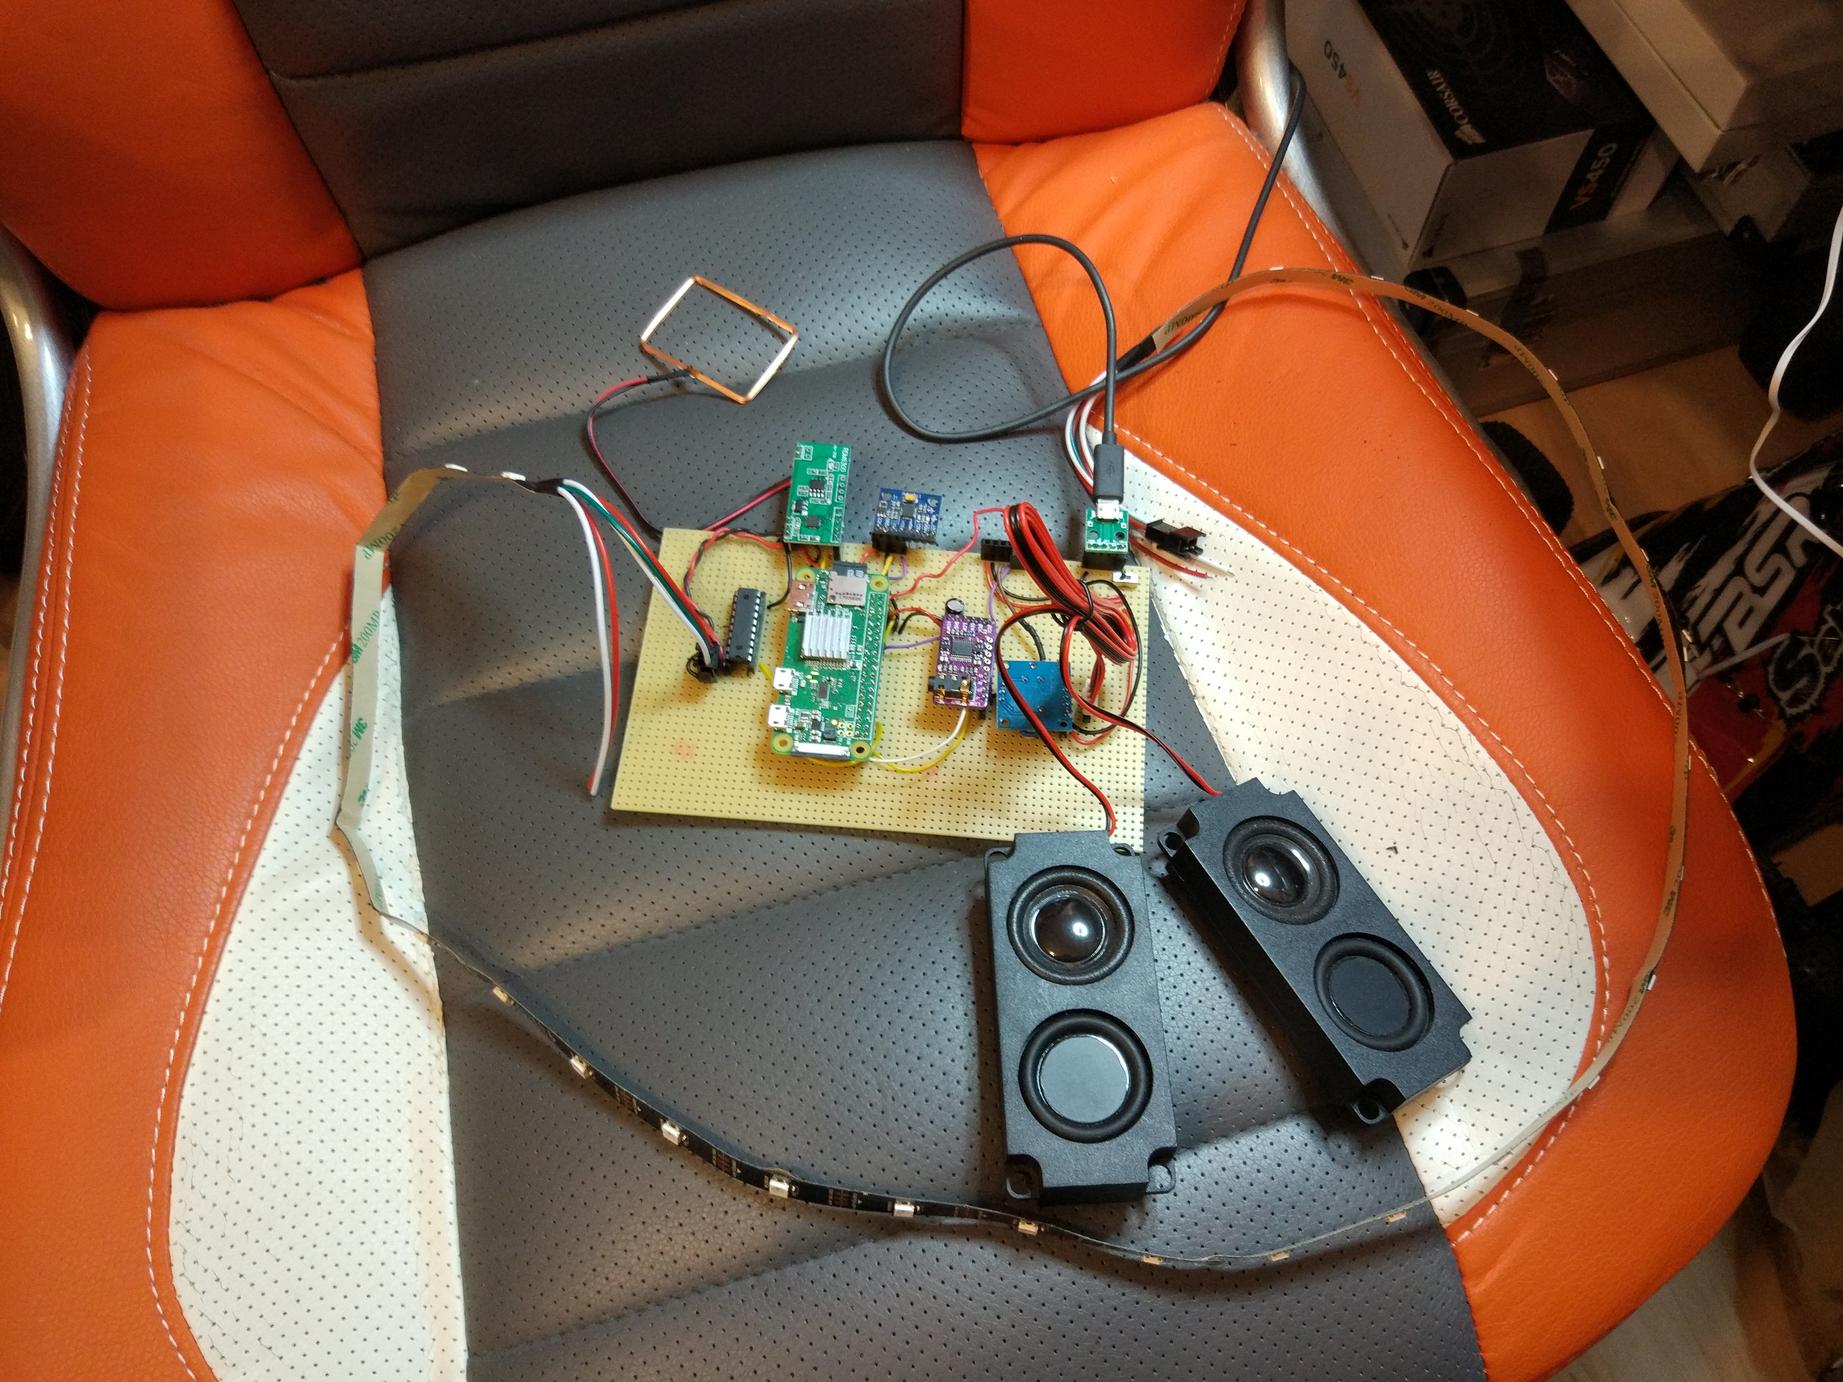

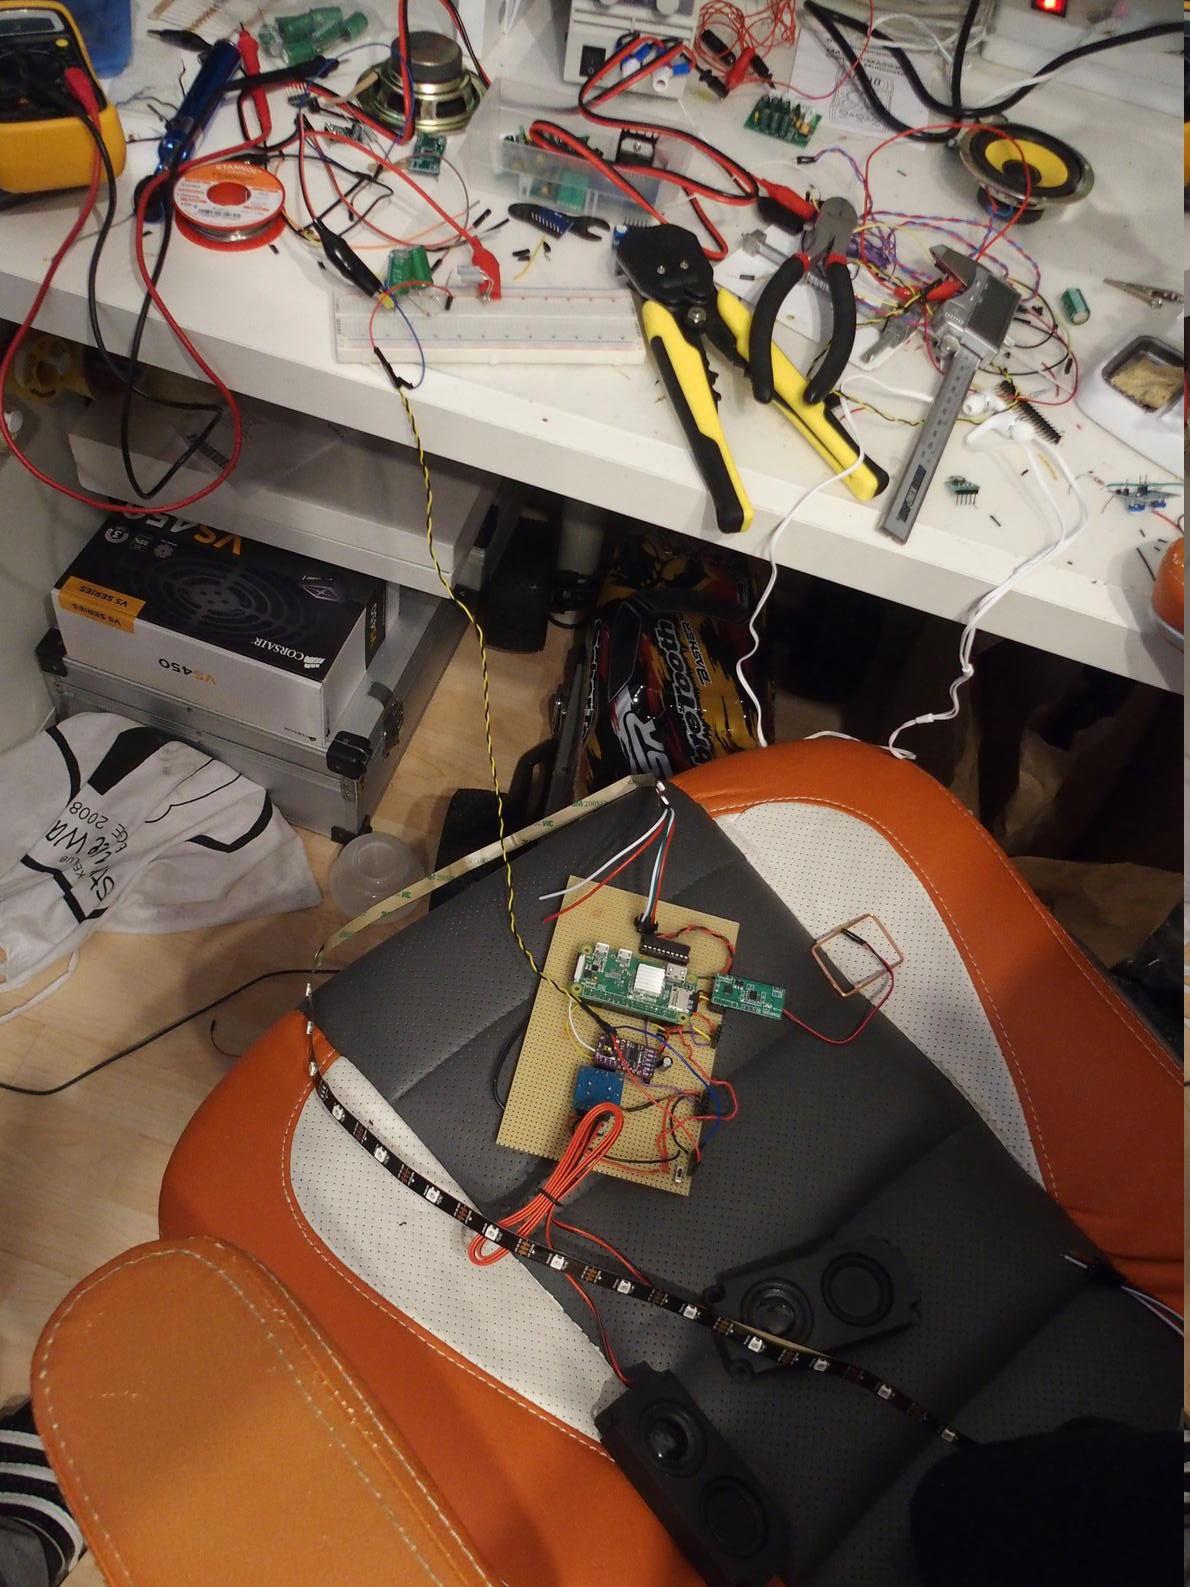
I didn’t want to use any SMD parts to not frustrate anyone more than necessary, including myself. Everyone should be able to solder the parts with a little practice and especially without a reflow oven. That’s why I chose to only use through hole components.
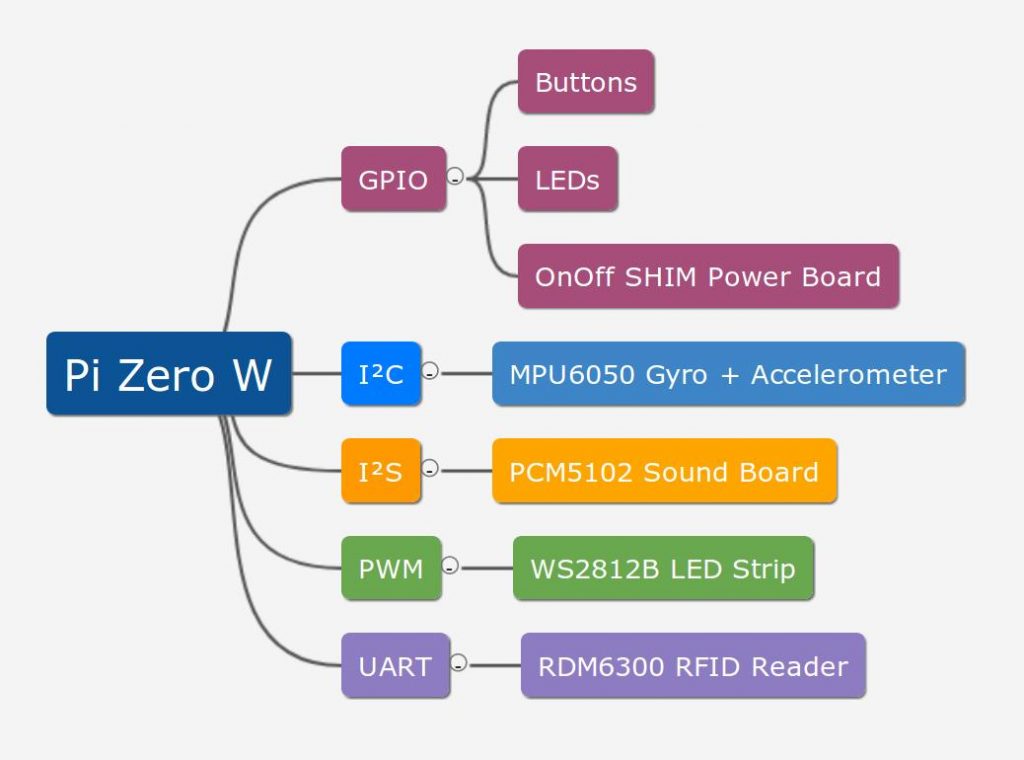
The toy needs a brain, wireless connectivity, a small form factor and some disk space to store audio files, programs and so on. The SOC should also be able to contact a few other electronic components.
- Raspberry Pi Zero W + micro SD card
If the device’s power is cut off at any given time, data loss may occur. To prevent this from happening, we have to implement some kind of soft shutdown procedure. Eventually I don’t want any current flowing from the battery to the board in order to preserve energy.
supercapacitors + diodes + resistors- OnOff SHIM
The main interaction with the real world is supposed to be RFID.
- RDM6300 125kHz RFID reader + RFID tags
+ TCRT 5000
Additionally, we’ll have a few big and colorful buttons for physical access. Moreover, we need standard components (pin headers, LEDs, resistors and stuff).
- arcade push buttons + standard components
The Raspberry Pi (all of them) doesn’t perform too well when it comes to analog audio. That’s why I opted for external sound components while being price conscious.
- PCM5102 Stereo DAC + PAM8406 Audio Amplifier + 2x 5W 8Ω full range loudspeakers
To communicate with the user, we add some RGB LEDs.
- 60 SMD LEDs/m WS2812B 5050 Strip + 74HCT245 Level Shifter
The Pi offers an I²C interface which we haven’t used yet. Motion tracking is another way of interacting with the device, so let’s add an IMU.
- MPU6050
To make the whole setup easily extendible, I planned to offer a pair of connectors, which was later completely forgotten when designing the 3D enclosure.
8 pin GX16 16mm Aviation Plug
A self-sustained device without an external power supply needs a portable source of energy which can be recharged easily. After dropping the idea of standard rechargable batteries like the ones used in many notebooks, I carefully picked a type of power bank that fits certain criteria.
18650 type 3.7V Li-Ion batteries + charger/discharger step-up converter + battery protection- 10.000mAh Intenso power bank
These electronic components should get us somewhere.
Here’s a little chart illustrating how all the different devices are connected to the main processing unit, the Raspberry Pi.